

In this part of the Virtual Lab setup, we will look at how to clean the image up before generalizing and packing it back up to its install state age.
To get started, if you haven't already, you need to run Windows update. This will save a whole bunch of time later, for when you start a new machine up from this image.

This may take some time and several reboots to get all the required updates. You should probably go ahead and install the optional ones now as well.
So now you've install all the updates, we can start cleaning up the image and reducing the size of Windows Server.
First you need to stop the Windows update service from the services console. Click start and search for 'Services', then scroll to the bottom and find 'Windows Update', right click and Stop.
Now you can delete the 'SoftwareDistribution' folder in C:Windows. This just a temp store for updates, logs and config's. (Depending how you delete this, you may need to empty the Recycle Bin)


The next step properly isn't going to do much since this is a clean install, but could be valuable step to keep things running smooth in future.
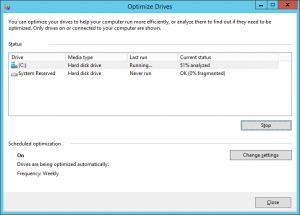
Running Disk Defrag tool quickly should insure Windows Server is going to be at its best for each server you fire up.
If your Virtual Hard disk is stored on an SSD however, its recommended not to run this tool.
And for the final step in Part 3, System Preparation Tool or Sysprep for short.
What is Sysprep? The Sysprep tool prepares an installation of Windows for duplication, auditing, and customer delivery. Full details here
To run the tool, navigate to C:WindowsSystem32Sysprep and run the application. Becuase we will want to duplicate and use this image in the future, running the tools with the options set to:
- Enter System Out-of-Box Experience
- Generalize
- Shutdown
OOBE will put the image back to the initial install state.
Generalize clears any settings unique to this install and forces the install process to generate the settings again.
Finally, we dont want to start this virtual machine again. Next we created the Linked clone in VirtualBox.

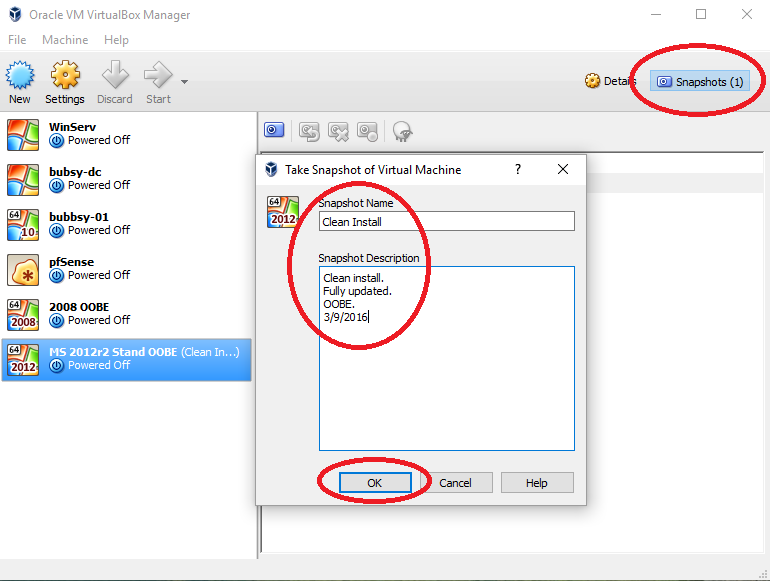
Once the machine has finished and shut down, we need to bring up the snapshot window in Virtualbox and create a snapshot.
You need to give it a name and a short description of what it is and when it was last updated.
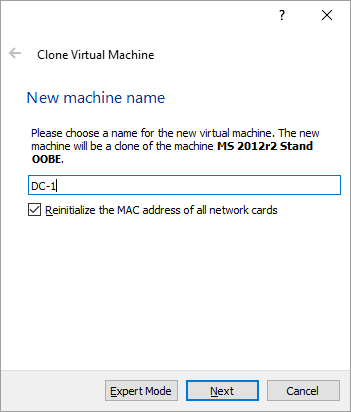
Once you have completed that, you can move on to creating the first Linked Clone. Right click on the machine in the list and click Clone.
Name your new server with something appropriate, like DC-1 or SQL, etc. Clicking Next, you need to select Linked Clone at the bottom and then click Clone.

And there we have it, you can now create as many clones of our server as you require for your lab setup.
This setup is intended for testdeveloping systems rather than production systems.